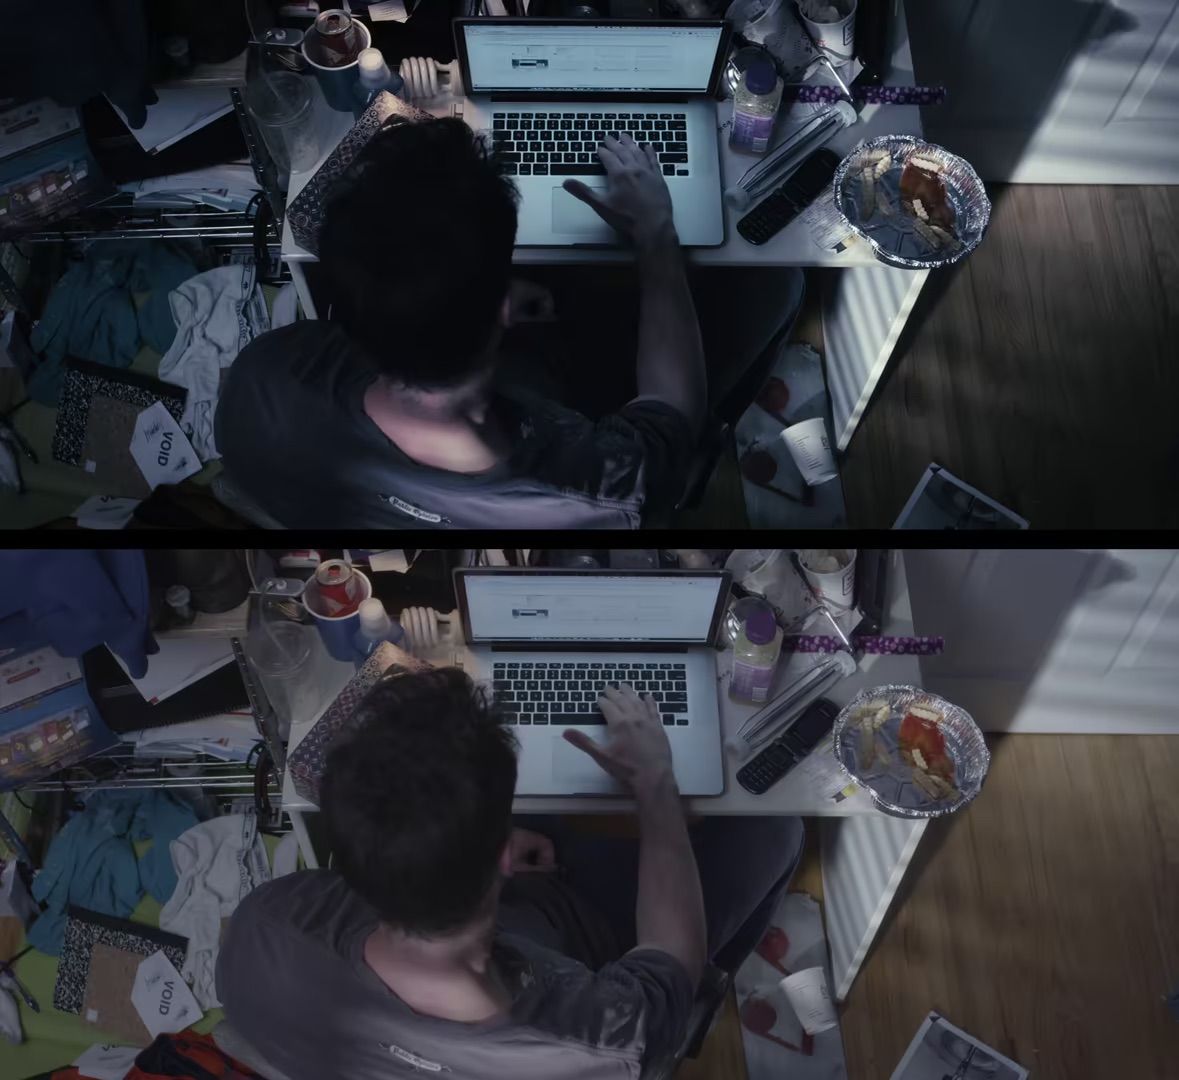
Color Correction before and after: Lily in the Grinder

As part of the Lily in the Grinder release, I’m making available a before-and-after comparison which will give you a sense of the weeks of work that happened between the raw camera video and the finished product.
Take a look:
Broadly, the video went through several stages during this time:
- Reframing: During shooting, cinematographer Judy Phu (one of the most talented people I’ve ever worked with) and I developed a language around composition in the video. So much of the meaning exists in the comparison between frames, and we wanted some compositions to match exactly. She framed wide and we punched in in post, creating (for example) the eerie effect around 6:07 where the characters’ entire faces matched.
- Compositing: To make the people semitransparent, we shot an empty plate of the background and superimposed it over the video. I also added rain to a shot (8:05), a rug onto the floor (4:47), put a character into a picture frame (8:55) and even added a book to the table that we couldn’t buy in time (2:14).
I took a few days to remove a fly from a shot (10:20). It’s winter, there are no flies!
Mistakes can be fixed in post — it just takes a LOT of someone’s time! - Stabilizing & adding shake — our schedule was inhumanly tight, not allowing us to do as many takes as we wanted.
My favorite effect: there wasn’t enough room to do a slow track in move like we wanted, so our DP jacked up the shutter speed, put the camera on her shoulder and slowly walked forward, framing very wide. We punched in and stabilized, and it looks like an incredibly smooth track move (12:10).
I also added shake to the sunset timelapse for a cool effect. - Removing strobing — I removed the slow crawl artifacts from a misbalanced flourescent light in the bedroom shots (4:47). It can be easily seen when scrubbing through the video. I isolated the crawl from the unchanging edges of the frame, then spread it over the entire frame and subtracted it.
- Color correction — I was going for a painterly, instagrammy look. You can see the use of a secret color correction trick, power windows, to enhance the lighting on all the characters’ faces.
I’m open to making a special FX tutorial or two — let me know if you’re interested in any of these effects.
